Desktop Native Recents
The ReachUC Desktop Native Recents screen shows the most recent activity grouped by contact and shown in reverse chronological order (most recent first).
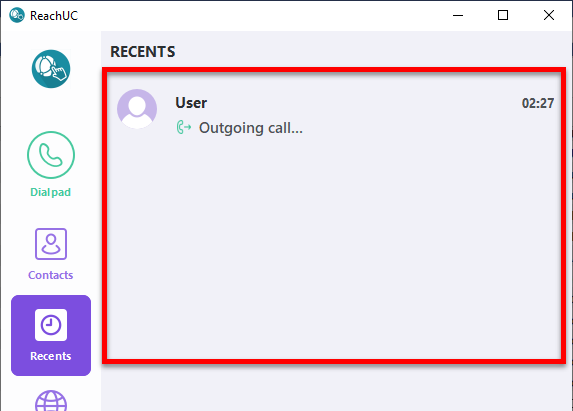
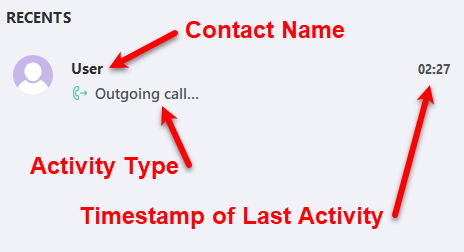
Each entry will show the contact name, type of activity, and the timestamp of the latest activity.
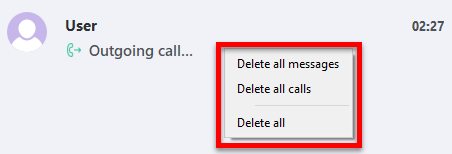
Right-clicking on any entry in the Recents screen will give you the option to
- Delete all messages from the contact’s history, or
- Delete all calls from the contact’s history, or
- Delete all of the contact’s history (this will remove the contacts entry from the Recents screen).
Contact History View
Clicking on any entry will open the screen that shows all activities you have had with the entry’s contact plus giving you options for the contact and a message entry area.
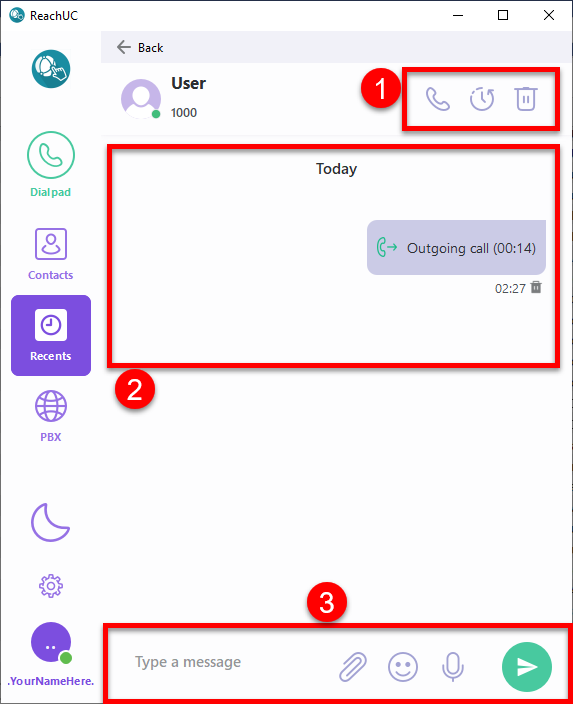
- Contact Option buttons
 Call Contact – this will initiate a call to the contact
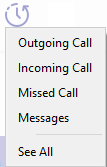
 History Filter – this will show a menu used to filter the events being shown in the History Entries area. Options are:
- Outgoing calls only
- Incoming calls only
- Missed calls only
- Messages only
- See all calls and messages
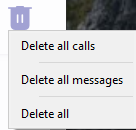
 Delete History – this will show a menu to delete from the history either:
- All calls only
- All messages only
- All history entries
- History Entries – These show all the activities in chronological order between you and the contact. Here you can remove a specific entry by clicking on the Delete
 button beside the timestamp for each entry.
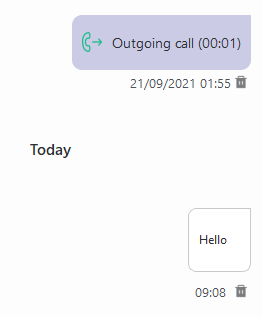
- Message Entry area
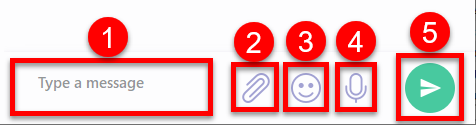
- Message Text area – click here to then type in your message.
- Attach button – click and browse to select a file to attach with your message.
- Smiley button – click and select a smiley to insert it into your message.
- Record Audio Message button – click this to record an audio message. A dialog will appear giving you a timer to show the length of the audio message, a Stop
 button that will stop the recording and cancel the audio message, and a Send
 button that stops the recording and sends the recorded audio as a message.
- Send button – click to send the message you composed to the contact.
Related Articles
Desktop Native Dialpad
The ReachUC Desktop Native App provides an easy-to-use numeric dialpad with the ability to directly send an SMS or call the entered number plus a customizable Quick Dial area for easy access to frequent and/or important contacts. Number Entry area – ...About ReachUC Native App for Desktop
Download and Install ReachUC To use simply download and install to your computer. Open the app then log in by entering your credentials then click on the Sign in button. A Windows App can be download when you click here. Open the downloaded file to ...Desktop Native Contacts
The ReachUC Desktop Native Contacts screen lets you easily search through your PBX contacts and customize your Quick Dial contacts found on the Dialpad screen. Search Area – easily search for who you want to contact by entering in full or part the ...Desktop Native SIP Logs
The Logs screen for the ReachUC Desktop Native App shows the content of the SIP logs for review and gives the user the ability to clear or save the information if needed for troubleshooting purposes. The instructions to do so can be found below. ...Desktop Native Settings
The Settings screen gives you control over the different options available for the ReachUC Native App as well as information you may need to report problems that may arise. About Accounts Notifications Sound Recording Controls Logs Reset