Get to know ReachUC
End User View
Android
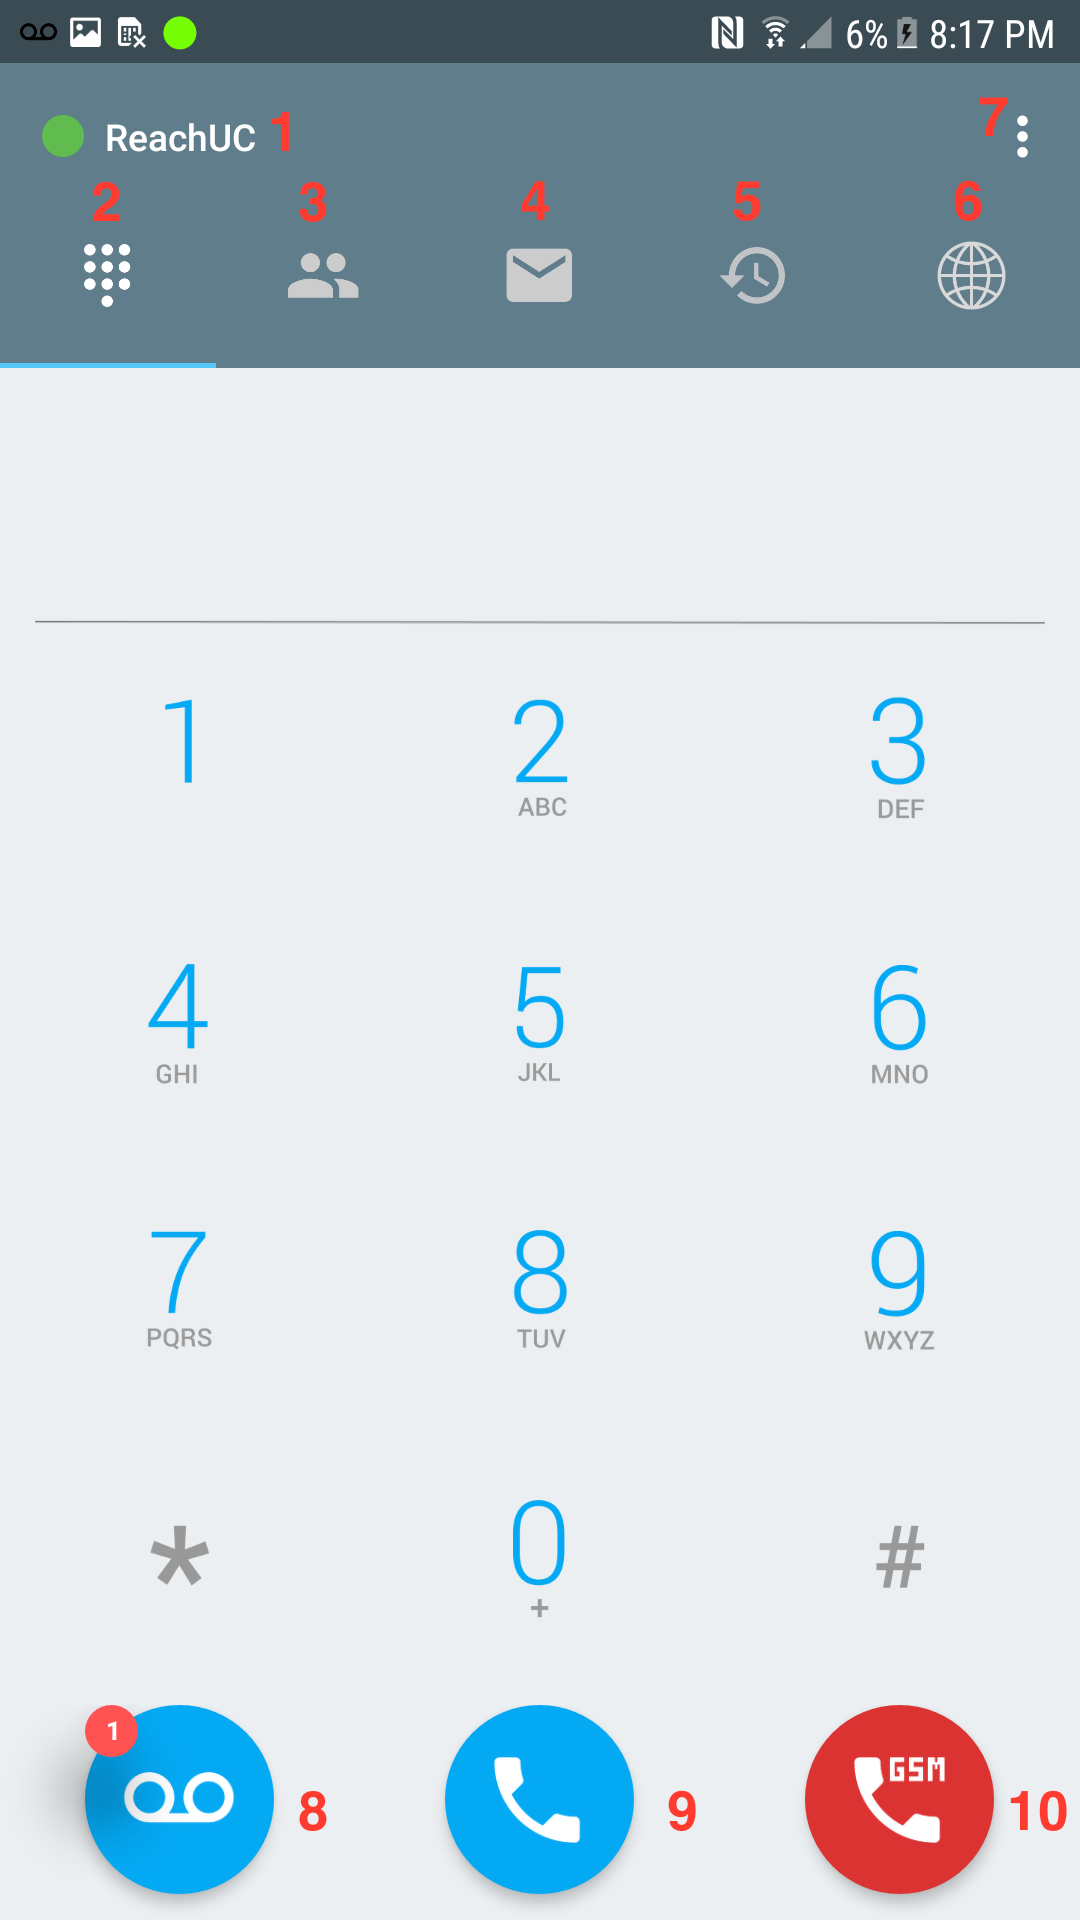 |
1. Registration Icon
5. Call History 7. Settings 8. Voicemail Button 9. Call button 10. GSM button |
IOS
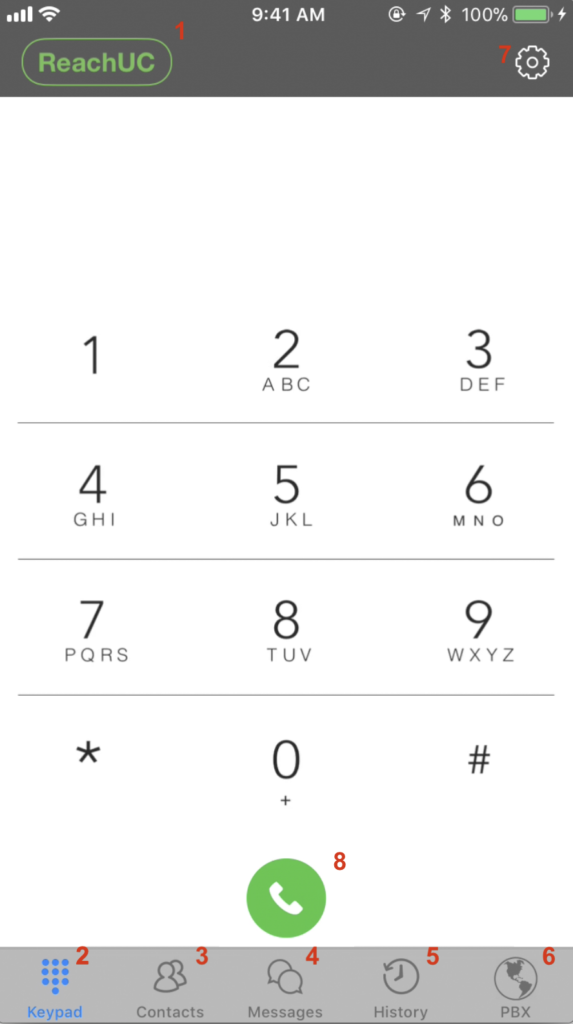 | 1. Registration Icon 2. Keypad 3. Contacts 4. SMS 5. Call History 7. Settings 8. Call Button |
Related Articles
Get to Know ConnectUC Mobile
This article is designed to help you familiarize yourself with the various tools and options within the ConnectUC Mobile App. If you would like to familiarize yourself with the Desktop/Web version of ConnectUC, please visit our Get to know ConnectUC ...Change Caller ID in ReachUC
Change Caller ID in ReachUC Sometimes an employee fulfills different functions in a company for which he may need to handle calls from different departments with different phone numbers. To solve this problem we can activate a special permission to ...Install ReachUC in your Phone for IOs (Apple).
1. Go to the AppStore and search for ReachUC. 2. Install ReachUC. 3. Open the welcome email from our system in your email and open the ReachUC. 4. Open the "Complete Setup" link. 5. Enter a new password, confirm the password, and define a PIN for ...Get to Know ConnectUC Desktop / Web
This article is designed to help you familiarize yourself with the various tools and options within ConnectUC. Login Begin by navigating to https://app.connectuc.io/ and sign in with your PBX credentials. Important: To log in to ConnectUC, you'll ...ReachUC Mobility PBX User Guide
Click on the icon to go to the ReachUC Mobility PBX pane. In this pane, you will see two tabs: Presence and PBX Account Presence Tab This tab will show all the users in your company’s PBX and their status: Online Offline Busy Clicking on a contact ...